Showing posts with label class examples. Show all posts

Music Assessments with Seating Charts


Not every educator faces the challenge of authentic assessment for hundreds of students a week like specialists do.  Some of my teaching friends see up to 200 or more students a day.  WOWZA!  In one school district I taught in, my administrator required 6 assessment grades per quarter.  I'm sure this worked well for classroom teachers, but I only saw my classes 8-9 times a quarter.  Who gives an assessment after 50 minutes of instruction?  It was then that I devised a plan for daily grades.

Using a seating chart template that I had created for my classroom setups, I adding a means for recording a participation grade and a daily grade.  I'm not a fan of participation grades.  It feels like I'm saying "Just do as you are told and you'll 'get' an A."  What I discovered is that occasionally I needed that participation grade to record to meet the requirements from my administrator.  Not what my kiddos NEEDED to be assessed on, but what I was being required to submit.
As this idea evolved I decided that I could take my student learning objectives (SLOs) and use those as a means of daily assessment without too much of a hassle.  The reality is that I was constantly using informal observation and formative assessments in the form of exit tickets and that I could make this work in my classroom.

I have multiple copies of these seating charts with the daily grade rubric and participation rubric right on them.   I sort them by class and then place them in  a three-ring binder in the order that I will see them on the schedule.  For example, all Monday classes are in order and then Tuesday and so on.  This makes it easy between classes to turn to the next class and just add the date and be ready to go.

At first I sorted by grade level, but didn't like the way I was still flipping through my book to find the class I needed.  Sorting by grade level may work for your classroom and schedule.
My seating charts function as my attendance book and partial grade book.  I add the date to the large box on the left and if a student is absent, I mark A in the corresponding box with the student name.  When setting this up, I include a color coded system to remind me about students that I may need to make special accommodations for including alternate activities or extra time for assignments.  In my district we have very few students that opt out of activities based on their religion so if I have a student that can't participate in holiday or patriotic activities, I'll mark that to remind myself to alter the activity or provide another one for those students.
I've tried to simplify this system every year.  Currently unless a student has a less than perfect score I do not record it on the seating chart.  If a student was in class and consistently displayed evidence of mastering whatever skill were working on then their box for that day is empty.  When I transfer grades to the computer it's less clutter to look at.

Look at the example below.  Phillip Washington has been in class all four days and earned all of the points each day.  He has four empty boxes.  Hillary Zenith below him has a similar report except on September 11, she earned 2 points instead of 3 on mastering the skill that day.

In addition to daily grades I also record grades that I take during class time on the seating chart.

Note:  This examples were created to look like sheets that I have used in my classroom, but I have made up the names to protect my kiddos' privacy.

My seating chart functions as a partial grade book because I don't write down every grade on the seating chart and then copy them into the computer.  I grade papers and enter them into the computer directly whenever possible.  Some activities like echo singing attendance, simple rhythm detection or performance are recorded in the seating chart as I take attendance or go down the row or whatever.  If we do a worksheet in class and grade it together, I may quickly record the grade and pass them back out.  I write this in my book because it is faster than pulling up my grade book program.


 I use rubrics for almost every performance event that I grade.  I post the scoring guide or print each student a copy so that they know how they will be graded.  The rubrics (above and below) are just a few of scoring guides that are available in my Ready To Use Music Rubrics.  It's 118 pages of scoring guides and data tracking tools that I've been using for years.  Click HERE to download the set.

Ready to try tracking assessments with your seating chart?  Download this FREE set of seating charts.  Several varieties are included and because this is a PowerPoint file you can manipulate the pieces so that it is perfect for your classroom.


Like these ideas?  PIN them for later.


post signature

Assessment in Music Class -What Do You Hear?

Looking for practical ideas for assessing hundreds of music students in your classroom?  Check out this idea for assessing rhythm skills called "What Do You Hear".

Can I confess something to you?  I have no idea how any of my elementary or junior high teachers came up with a grade for me.  Not a single one.  Did they just "give" me a grade?  Did I do something to earn it?  Was there every any real assessment?  I don't think so.  I think that I got an A because I was a good kid that did what I was told.  Of course, that must mean that kids that didn't do that would have received a different grade.  Is that crazy?  Have you been guilty of that?

I guess that is one of the reasons that assessment has been so important to me.  I've created hundreds of rubrics, sat through dozens of assessment workshops for math and reading teachers trying to glean everything I could and challenged other music teachers to show me how they plan for authentic assessment.  I've learned that there is a wide variety of strategies for grading or assessing students in music class.  I've seen elaborate data tables and heard others say "I just give them an S, no matter what."  Whaaaat?  I've tried to find a balance based on how often I see my students and what I want them to be able to do when they leave my classroom.

Today I'm going to share with you one of my favorite tools for assessing rhythm skills.  I call it ear training, but it isn't exactly what I remember doing for my Ear Training classes in college.  I use these assessments most often with 3rd through 6th grades but they could be adapted for use with younger and older students.  When I taught high school band I used this type of assessment all of the time.

Check out this video to see how I use my What Do You Hear set of worksheets.  You can download them HERE if you are interested in trying them out in your classroom.


Like this idea?  PIN IT for later!
Looking for practical ideas for assessing hundreds of music students in your classroom?  Check out this idea for assessing rhythm skills called "What Do You Hear".


post signature

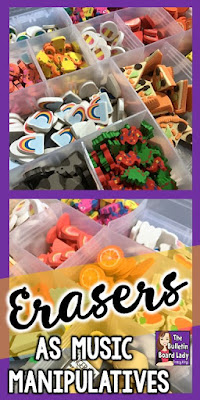
Erasers as Music Manipulatives

Mini erasers can be a valuable manipulative in the music classroom.  Use them for rhythm activities, pitch work and workstations.  Learn more and start collecting!

My 5 year old daughter is a collector.  Okay, she is probably a future hoarder.  She loves putting things in her "collections" and one of those treasures is erasers.  She loves those colorful, unique erasers not so much for erasing but for pretend play, counting and more.  This gave me a great idea for music class!
Mini erasers can be a valuable manipulative in the music classroom.  Use them for rhythm activities, pitch work and workstations.  Learn more and start collecting!
I decided to use the 16 block grid as a means for students to create and organize rhythm patterns based on the erasers.  I talk a little bit more about the grid and the lap packs they are used with in THIS blog post.

Mini erasers can be a valuable manipulative in the music classroom.  Use them for rhythm activities, pitch work and workstations.  Learn more and start collecting!
At this workstation, students choose an erase and put it in a square.  Then, students decide what to call the eraser.  They can be creative with this part (and often are!).  When they decide what to call the eraser they write the name under it.  In this picture they actually put it in the second row, but usually we put it in the same box as the eraser.

Mini erasers can be a valuable manipulative in the music classroom.  Use them for rhythm activities, pitch work and workstations.  Learn more and start collecting!
Students can be creative in naming the erasers depending on the rhythms they know or want to use.  For example watermelon could be called "fruit".  Pizza could be "slice" or "piece of pizza" or "veggie pizza".  This works are a means of differentiation.  Students can make this as difficult or as easy as they like.

After they have created the rhythms, they share them with their group.  I use this activity as part of a workstation rotation so there are 3-5 kids in a group.  Students can then choose body percussion or a small percussion instrument to perform their rhythm as an ostinato in their group.

This would also work as a whole group activity.  You could write the rhythms on the board or use a document camera, erasers and grids to replicate student compositions.  Then you could create ostinatos using percussion instruments, Orff instruments or body percussion to create a really fantastic piece.


Mini erasers can be a valuable manipulative in the music classroom.  Use them for rhythm activities, pitch work and workstations.  Learn more and start collecting!
I've found erasers in many different stores:  Target (Dollar Spot), Office Max, Five Below, Dollar Tree and more.  I'm storing them in a box that was designed for beads right now, but I think that I might try this organizer (from Michael's) as my collection grows. (Pictured below.)
Mini erasers can be a valuable manipulative in the music classroom.  Use them for rhythm activities, pitch work and workstations.  Learn more and start collecting!
 In addition to using the erasers for rhythm practice you could also use them with a staff and do melodic dictation using the erasers as note heads.  This would be particularly fun if you had erasers to match the theme of a song.  For example, fish while listening to "Aquarium" from Carnival of the Animals or Jack-o-lanterns while listening to "Night on Bald Mountain would be fun to create an activity around.

I hope that you have been inspired to try mini erasers in your classroom.  I also hope that I haven't created an addiction for you!  I have already started collecting erasers for Halloween, Christmas and Easter!

Like these ideas?  PIN THEM for later!
Mini erasers can be a valuable manipulative in the music classroom.  Use them for rhythm activities, pitch work and workstations.  Learn more and start collecting!


post signature

Lap Packs - How to Use Them and Why You'll Want To

Lap Packs are inexpensive ways to get students writing in music class.  Customize them to include exactly what your music students need.  This article has some great ideas for their use and FREE downloads!

I am a a big fan of writing in my music classes.  You'll probably notice as you browse through this blog that I use many different strategies for incorporating writing.  I use exit tickets, oral writing, group paragraphs, writing prompts and more.  Most of these tools are for writing about music, not actually writing notation.  Lap packs are my go-to tool for writing notation in my classroom. 

Lap Packs are inexpensive ways to get students writing in music class.  Customize them to include exactly what your music students need.  This article has some great ideas for their use and FREE downloads!

Lap Packs are my name for page protectors stuffed full of templates.  I have 3 or 4 sheets per page protector and most of them have a template on front and back.  I use a piece of cardstock or two when I am making the copies so the lap packs are pretty sturdy and can just be used on a lap.  No clipboard or desk needed! 

Lap Packs are inexpensive ways to get students writing in music class.  Customize them to include exactly what your music students need.  This article has some great ideas for their use and FREE downloads!
When I first started using lap packs, I paid extra for page protectors that were described as "high quality" and "extra thick".  Yeah....turns out that the cheap ones work just as well!  Some years I switch out 2 or 3 page protectors and other years I switch out 30 or 40.  It really depends on my students, how often I leave lap pack activities for my sub to use and how diligent we are when erasing them.  

I use regular dry erase markers and we erase with a piece of a paper towel.  I get a pack of paper towels from the custodians and then cut them in thirds.  We don't erase very much so the small piece of paper towel is more than enough.  Someday I'd like to buy something else to use as an eraser, but until then this free option works well.

I store my lap packs in a magazine box.  I encourage students to put them back in the box with the open side on top.  When others pull out a lap pack with the open side on top they don't lose all of the pages on their way to their seat.

Lap Packs are inexpensive ways to get students writing in music class.  Customize them to include exactly what your music students need.  This article has some great ideas for their use and FREE downloads!
Most of the sheets in my lap packs have two sides.  This just makes it easier for me when copying and it also makes it easier to have students change the sheets that are on top.  

On one sheet I have a large staff (no clef).  We use this with bottle caps for learning pitch names and melodic dictation.  I also use this side to introduce line notes and space notes with younger grades and for composing simple ostinatos.  The back side of this sheet contains 2 smaller staves.

Lap Packs are inexpensive ways to get students writing in music class.  Customize them to include exactly what your music students need.  This article has some great ideas for their use and FREE downloads!

The green sheet contains a set of body percussion staves.  I like to use different colored pages because it helps students find the sheet they need and switch them quickly.  The back of this page (pictured below) contains a graphic organizer.  This graphic organizer is great for instruments of the orchestra, SATB, identifying characteristics of a musical and more.  

Lap Packs are inexpensive ways to get students writing in music class.  Customize them to include exactly what your music students need.  This article has some great ideas for their use and FREE downloads!

Another page (copied on pink paper) contains 4 beat boxes.  Okay, you can call them whatever you want, but I call them beat boxes because each box represents one beat.  In the picture below you'll see that beneath the beat boxes there are two lines.  I use this sheet for composition projects using sol/mi or sol/mi/la.  Students draw a quarter note or barred eighth notes in one of the beat boxes and then draw note heads on the lines to indicate sol or mi.  Students are immediately successful and there are many activities you can do with their compositions.

Lap Packs are inexpensive ways to get students writing in music class.  Customize them to include exactly what your music students need.  This article has some great ideas for their use and FREE downloads!

Lap Packs are inexpensive ways to get students writing in music class.  Customize them to include exactly what your music students need.  This article has some great ideas for their use and FREE downloads!

On the flip side of the pink page is Martha Stanley's Mighty Music Grid.  I use this grid for SO many things.  My favorite activity for this grid is rhythmic dictation.  For Kindergarten classes we practice writing quarter notes and quarter rests and clapping our patterns with a friend.  In 1st grade we create sound songs by drawing symbols for various sounds and body percussion in each block.  In other classes we take rhythmic dictation just like you did in college.  I clap a rhythm, they echo and write it down.  Students love the challenge of matching my pattern and become quite skilled at deciphering rhythm patterns.

Lap Packs are inexpensive ways to get students writing in music class.  Customize them to include exactly what your music students need.  This article has some great ideas for their use and FREE downloads!

I also include a blank sheet in each lap pack.  This page has been used with my youngest students to illustrate what they have heard.  With older students we have created vocal exploration patterns, choreography, graphic organizers and flow charts and listening maps. 

 The picture below was an example from a 5th grader.  Okay...this wasn't just an average student.  This student went above and beyond and created a pretty amazing listening map for the overture from William Tell.  I'm not exactly sure what the question marks were for, but they worked well with the song.
Lap Packs are inexpensive ways to get students writing in music class.  Customize them to include exactly what your music students need.  This article has some great ideas for their use and FREE downloads!

If you are looking for a way to incorporate any of these activities but hate getting bogged down with shuffling papers and stacks of pages to grade, I would definitely recommend using lap packs and dry erase markers.  Instead of grading papers, I walk around the classroom and make notes on my attendance sheet and record points later.  This makes assessment easy for me and stress free for students.

So have I convinced you of the awesomeness of lap packs?  Try them out!  I put together a few of my favorite pages for you to try in your classroom.  Follow THIS LINK to download them.  Let me know how lap packs are working for you in the comments!

Like these ideas?  PIN THEM for later!
Lap Packs are inexpensive ways to get students writing in music class.  Customize them to include exactly what your music students need.  This article has some great ideas for their use and FREE downloads!


post signature

I Got Plenty of Nuttin'

Teaching music with no resources? How do you teach without text books, instruments, equipment or technology of any kind? This blog post explores ways to get what your students need to be successful by Martha Stanley.

Today's blog post is written by the extraordinary Martha Stanley, MME, NBCT EMC-MUSIC, 2002, 2012 (recently retired and currently rested).


   Twice in my 43 year career I have walking into teaching situations where there was very nearly nothing to work with, first in Florida and later in Arkansas. Both times I built a program and acquired materials and left those positions in far better shape than I found them.  I did have a decent budget, but it wasn’t sufficient, so I had to hustle to get what my students needed.  Since financing is always an issue, resourceful teachers find work-arounds.  
This article is intended to give you some ideas of things you might do to get things you need for your program.


My main reasons for success were based on five main activities.

1.  I kept my eyes open for what I wanted. Literally - I looked around. When I saw something that would be helpful, I took some appropriate action to secure it. It didn’t always work, but it sometimes I got great stuff like a LED projector on a cart and a class set of iPads.
2.  I asked around for what I wanted and for advice on how to get it. Many people knew things I wished I knew and when I asked them, I got great answers. Don’t be shy.
3.  I was active in my teaching peer-groups which put me in contact with people and situations that could be beneficial. This was possibly the most important aspect of my success. So, in answer to the question, “Should I join my professional groups?  They are soooo expensive,”  I wholeheartedly say, “YES.”
These groups included my local and state NAfME, Orff and union/professional groups. It also included being active in online music education groups.  I started the first online music ed bulletin board in Florida back in the 80’s.  There I met Artie Almeida and Laurie Zentz - good company, yes?  By going to conferences, I met well-known experts and authorities and quizzed them for ideas. I did one a favor and it has been returned ten-fold.  By being active online at Music K8 and much later Facebook, I met and have been enriched by Tracy King and many others.   By belonging to groups, I became aware of opportunities that turned into benefits for my students.    I did presentations locally, at state and national conferences and connected to a lot of people I knew only online. When I volunteered to re-do the Florida Elementary Music Education Association’s website, it connected me to the movers and shakers of the state level officers.  I suspect that was the beginning of why I was selected to be the Florida Music Educator Of the Year in 2009.  By putting myself in these places and situations, I was able to make nationwide (and one international) connections that paid off in free materials and more.
4.  I was willing to spend other people’s money for training in many things that are not necessarily music oriented.  But I saw how to transfer the learning into my teaching and as a result, I got knowledge and skills in topics that one wouldn’t normally expect a music teacher to have. Frequently, materials were offered as part of the training.  When federal funds were paying classroom teachers to participate in how to develop effective classroom groups, I insisted and badgered the administrators until they let me, a mere music teacher, join. I eventually turned that into my major paper for my master’s degree. I made sure I was in every technology opportunity offered to classroom teachers, even when it was initially offered only to classroom teachers. When national board teachers were invited to participate in a train-the-trainers course in Systematic Vocabulary Instruction, I rushed at the chance. Music teachers have vocabulary to teach, right?  I taught SVI at two schools and developed material for their classroom use that I was able to use in my music classrooms.  When I participated in union and staff development councils, I was sent to conferences on their dimes.   When an internship after completing Orff Level III was offered to me, I took it. All of these trainings impacted my students in positive ways, but I had to be open to the advancement and be willing to take it when it came along. These activities also connected me to people and programs that offered materials, grants and future contacts. And honestly, it showed that music teachers are more than “just music teachers.”
5.  I was willing to write grants. Yes, it’s a chore, but it sure honed both my ability to state succinctly what my students needed and also my ability to justify it to the grant readers, principals and other funders. I learned how to advocate for my program’s wants and needs and this helped convince others to give support.  My programs have been significantly improved by 12-15 grants - I’m not sure. I’ve lost track.   
           I stayed at the front of any new movements coming along, musical, classroom and technology, usually through being active in groups, and found that classroom teachers often failed to write grants which left me the opening to do so.  There are a lot of opportunities to get funding when you tap into classroom projects. For example, I got small percussion instruments which I used as wonderful adjuncts to a poetry writing unit.  When PowerPoint was the new thing, I figured out how to use it at school in new ways and got a big screen TV before projectors and flat screens were common. When Orff first came into my life, I figured out how I could get instruments (my first grant). Basically, I figured out what I wanted in my room and then dovetailed it into a grant somehow. You can do that too. Think creatively.

For what it’s worth, here are my biggest tips for writing a grant.  

  • Point out what your students CANNOT presently do because they don’t have the “thing” the grant is for. Figure out how to state what your students COULD do if you got the money for the grant. NEVER write it for how it will make YOUR life better even if that’s your main reason for writing the grant.  Make it about students, not you.
  • Don’t whine to me about how hard it is to do the paperwork and follow-up that may be required. Write it so that it’s realistic for you to do.  Don’t whine about how fake the project may be….”I’ll only do this for one year.”  YES!   One year to make your grant-funders happy and forever after, you do it YOUR way.
  • Figure out how it fits into something larger than your curriculum.  Twist your brain around until you can come up with how the students will benefit.
  • I used “assessment” as a hook more than once, for example. What education grantor can be against better assessment?? I included it as part of my professional growth plan as well to add more appeal to any grant I might want to write and because I was truly interested in doing better assessment. Without the grant object I wanted (a portable dry erase magnet board once and clickers/individual responders another time), my students would not be able to have effective individual assessment. Without the grant object (which just coincidentally was a wonderful thing for me - wink wink), they could not get high quality, tailored feedback that would inform my targeted instruction. Do you see how I used educational wording? So the hook was great for for the kids and I got things I drooled for.  Authentically and legitimately.  The grant readers, rarely music educators, could identify with the “assessment” and “targeted instruction” pitch a lot better than one that targeted getting kids to read staff notation better. (Yawn.) And in MY brain, how it played out in the classroom was going to look exactly the same either way plus it looked quite professional since it responded to my professional growth plan.
This is sometimes crazy-making, but it’s good for you and it’s really good for your students.


So with those five points in mind, I’d like to share what my no-cost materials acquisition process looked like in the real world, my last teaching assignment.  It was five years at two teeny, impoverished, rural north central Arkansas Title 1 schools where I had a total of 400 students and I taught K-12, instrumental and choral classes. I found a single box of crappy, pre-k type instruments to use for both schools. There was a collection of the previous 5 years of Music K8, Activate and Music Express, 5 keyboards, 2 bad boomboxes for sound. A nice piano at both schools was a pleasant surprise. I also discovered 52 VHS tapes that were clearly heavily used. One school supplied me with a new laptop. That, ladies and gentlemen, was the sum total of what the schools offered me to work with.


Materials acquisition became a high priority. Did I say that in an understated way or what?  As you read through the following, notice which “reason for success” or combination from above is being used.


Here is what I did to get free stuff.

  • I begged.  I got free buckets from a grocery store bakery, enough for both schools to do drumming.  The shop teachers furnished and cut up a bathroom wall board and I got 32 mini-white boards which I used extensively.
  • I whined.  One principal gave me the computer sound system right off his work computer. It was nice!  A community member who wished to be anonymous bought 30 ukuleles.
  • I went through the district technology dump rooms. More than once.  I found some truly uninspiring computer speakers that worked and voila, I had a classroom sound system. I also found a huge cork bulletin board and a smaller bulletin board which I had installed.
  • I searched every vacant room and closet for whatever I could find.  I found a projector on a roll-around cart and claimed it. I asked about the Smart Board that I’d seen just sitting around. It was being used as a room divider!  I asked every teacher in the building and no one wanted it, so I claimed it. I had to set it up, contact the company for software and do everything because it was the only IWB in either school and no one else knew anything about interactive whiteboards.  And it became MINE. All mine! (Insert evil laugh here.) It completely transformed my ability to deliver instruction.
  • I schmoozed the custodial and maintenance staff for anything I didn’t have.  They helped me get a dry erase marker board for one school, batteries for the clocks which I had to provide, and a whole lot of information about what was stashed where that came in helpful along the way. They came up with tables, shelving units, storage cabinets and file cabinets. Bless them.
  • I asked all the teachers for their ideas of what was available.  They knew things I didn’t about how to get supplies. I got a set of multi-fix cubes for composition and rhythm dictation from the math teacher. One teacher knew where a set of risers, unusable unfortunately, was in the tech dump room. One knew where there was a magnet dry-erase board and I got permission to get it, but we got a new principal who nixed that idea.
  • I used personal equipment.  No surprise there.
  • I wrote DonorsChoose grants. I got a Bose computer speaker that was great. I got a set of temple blocks for the high school drumline.
Teaching music with no resources? How do you teach without text books, instruments, equipment or technology of any kind? This blog post explores ways to get what your students need to be successful by Martha Stanley.

  • I checked with the other music teachers in the district and was able to get a conga drum for each school which I used a lot for movement and creative activities.
  • I was offered a complete set of usable risers from a teacher in a neighboring district and was not able to accept them because neither school would provide a storage space.  Sigh…...
  • I made friends with the tech people and tried to be interested, cooperative and supportive. I got quick fixes on tech issues and expert advice when I needed it. They helped me find equipment, carts, projectors, cords, plugs, and such so I could use the tech skills and knowledge that I’d built up over the years.  Once, in the tech office, I saw a pile of unopened iPads in boxes which sat there for quite awhile.  I asked about them.  There was, unbelievably, no plan for them.  I already knew how to use them better than anyone else in the school, so out of the goodness of my heart and my desire to use school resources to the max, I volunteered to use them in my classes and suddenly I had 10 iPads, a workable class set, at my disposal. I could have asked for more, but my conscience wouldn't let me.
  • I queried the school secretaries about everything to do with purchasing and schedules. They’re the ones who knew who the piano tuner was and what programs I was expected to set up and the workarounds I needed for all kinds of situations. They found me office supplies when others went without.
  • Before I moved, I was allowed to take some of the material I’d gotten through Florida grants with me including a generous set of Boomwhackers, which turned out to save my hide with high schoolers.
Teaching music with no resources? How do you teach without text books, instruments, equipment or technology of any kind? This blog post explores ways to get what your students need to be successful by Martha Stanley.

  • I had also volunteered to be on the Florida state textbook selection committee one year and got to keep the Share The Music teacher editions and support material that I reviewed, including the CDs. They were my only curriculum CDs in my new schools. Volunteering is a good thing.  Lots of useful payoffs come your way when you do.
  • I “cashed in” with amazing people I’d never met face to face who offered help.  As a result of being active online and in my state music education community (NAfME and Orff mostly), I knew a lot of people in my old state, my new state and over the nation.  These contacts were tremendously helpful in many ways as I worked to improve my new situation.  It was wonderful to have people I knew well online in my new state who could coach me about the differences in the two school cultures.  Laws, staff development issues, requirements that were totally new to me gave me fits but I had music people to help me out.  In my district, nobody knew much about how to feed and nourish a outsider music teacher.
  • I continued to whine online on Music K-8 (what a Godsend that site is), my go-to my online support community since 2003.  People generously started sending me things unsolicited! I was so humbled and grateful.
  • A well-known international music educator from Canada offered me a slew of materials left over from a conference.  We had created a good working relationship over the years and she pretty much saved me.  
  • A teacher from New York sent MIOSM stickers annually and a classroom set of recorders.
  • Another Arkansas teacher convinced her assistant principal who was visiting my area to bring me a complete set of old but really good Share The Music books.  Another sent a second set so I had a set per school.
  • A former Florida colleague sent me a pile of choral material.
  • TeachersPayTeachers was just getting started well and teachers asked me for feedback on their products pre-publication in exchange for keeping the materials.  I got some incredible resources that way. (Yes, Tracy King, I’m talking about you.)
  • While I was at a ArkMEA conference, I saw some flyers, just lying abandoned on a table in a hallway, for intriguing looking materials from a new Australian music materials publishing company. I remembered them when I saw their Facebook entries.  When they asked for volunteers, my hand was first to be raised. I got to try out and give feedback on several modules which turned out to be fabulous. And I got to keep the materials.
  • I researched online for free materials. I was especially strapped for high school instrumental material.
    I found keyboard material but I ended up needing to tweak it so much for my unique groups of students that it wasn’t very useful.  However, I discovered that bucket drumming was great for my middle and high school students. It didn’t take too long into the first semester before I was scrambling for age-appropriate material.  It had to be free and specialized for my students.  I found freedrumlinemusic.com! We ended up using it, with heavy adaptations, for a successful semester course which I taught three times.  
  • I also read Music K8 and Facebook music forums where people would mention free apps and I used apps to find free iPad apps.   I collected many freebies which I installed on the iPads.
  • Later, one school bought a pass at iTunes for iPad apps which could be downloaded to school iPads with a special password.  Few teachers took advantage of it so I asked if I could use the allowance.  I ended up spending quite a bit of money on big-time apps and got some fabulous music apps for the music iPads. With my unique curricular needs in middle and high school, some of the apps were wonderful for small group work in composition and research.  


All these little things accumulated until there was quite a bit of material added to the music program with no cost.  It did take willingness to put out some effort, to be an active part of professional associations, to read online material, to shake a few trees and do some work, but there was no cost for these things.  The program was being built.


My program was also supplemented by the budget provided, but don’t despair if you don’t have a lot of cash to spend.  Perhaps you can now see ways that you can augment your program after seeing what someone else did it with no cash.


Remember:  keep your eyes open, ask around, stay active and involved in professional activities, take advantage of training that may not be music-related,  and write those grants!
Good luck!
______________________________________________________________________________
Martha is a happily retired music teacher, pursuing new activities and interests like gardening, playing old time/bluegrass music and studying herbalism. But she still has school dreams many nights.
She has been certified K-12 in music and gifted/talented in both Florida and Arkansas. Along with her MME and Orff Level III+ certification, she is National Board Certified, EMC-Music 2002 and 2012.
She was named Florida Music Educator of the Year in 2009.  


post signature